I can honestly say this was the most challenging piece of art I've ever had to create. I started off relishing the challenge and looking forward to creating such a big painting. Over time, however, that enthusiasm waned slightly and as I progressed, painted over, and repainted certain elements I started wondering how on earth Rolf Harris does those huge paintings he was famous for when I was growing up!
The plan was to create the illusion of a Spanish Villa - the terraced area overlooking the garden and surrounding countryside of the Sierra Blanca. I researched images of the area- it stated in the play that you could clearly see the mountain range in that area (the Sierra Blanca takes its name from the Sierra Blanca mountain range of which La Concha, the mountain that towers above the urbanisation, is part). I also wanted to feature a bougainvillea bush as it's mentioned several times in the play.
The first job we had, which we (my husband Keith and I) did soon after the New Year was over, was to paint the walls of the inside of the "Villa" with a magnolia colour. We'd already built the set in September/October so most of the rest of the work was electrical and decorating along with ensuring everything was safe.


 |
| Add caption |

 |
| Close up of SL arch showing gridded plan |
 |
| Close up of terracotta wall tiles painted onto the lower edge of the "terrace" wall. |
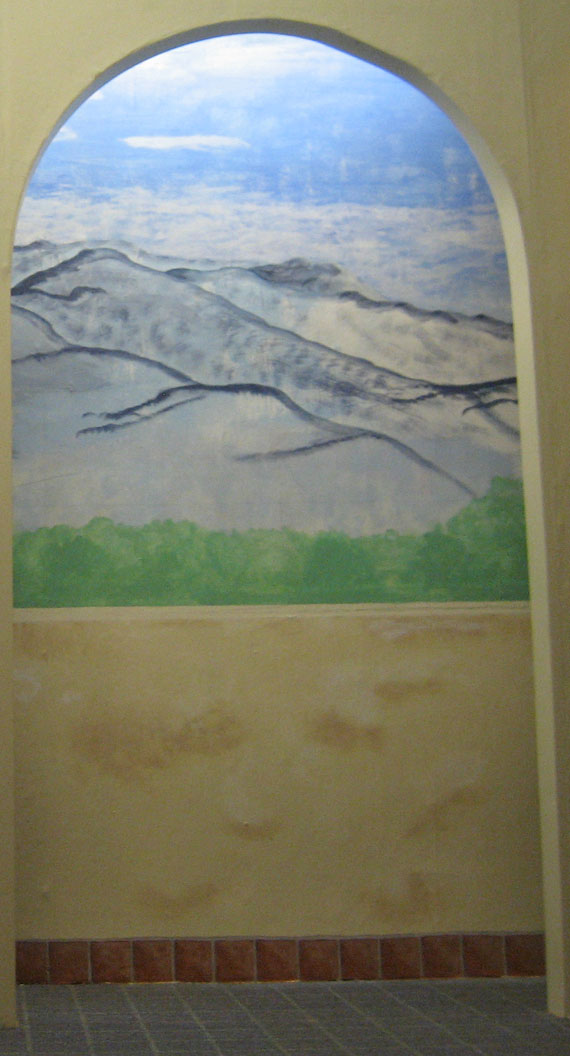
Day 4 - January 9th. A long time was spent today painting in the top of the terrace wall, the shaded areas to give some texture to the surface of the wall, and the tiles at the bottom of the wall. Keith helped by marking out a grid on the wall for the plan of where all the mountains would be placed - if you look at the close-up images you can just about make out the pencil lines and in one of the images you can see the plan I was working from. I also blocked in an area of green as a base colour for the garden.
 |
| Mountain line drawn in and basic sky colour blocked in. |
 |
| Low line of clouds painted in at the top of the mountain range. |


Day 6 - January 12th. Didn't have much time to spend on the painting today as we were starting rehearsals with the Youth section again after the Christmas break and needed to do the lesson plan etc. However, if you look closely you can see that I've painted out the clouds that I did last time and repainted the whole of the sky. I didn't like them!

Day 7 - January 14th. Keith decorated the "hall" wall with some plain white textured wallpaper today (you can't actually see it in any of these photos, will show full stage later). I blocked in the mountains and created a new sky/cloud formation. I've also pencilled in other areas ready for painting - a house just beyond the garden, and the corner of a swimming pool which is supposedly in the garden.


Day 10 - 19th January. I wasn't at all happy with the effect of the swimming pool in the garden - it just didn't look credible so I decided to paint it out and just have lawn instead. I added some highlights to the bougainvillea bush and painted several different washes over the various levels of green in the distance - and added some hedge lines here and there to help delineate them.


Day 11 - 21st January. I painted in the suggestion of another small bush creeping over the wall in the SL archway, changed the appearance of a tree positioned in front of the house, in the SR archway and added some more greenery to the creeping plant at the side of the house.


 |
| "Reading Between The Lines" and "Baobab" |
 | ||
| "Watching Paint Dry". |
My next piece of artistic output will be something much, much smaller - a postcard painting for an exhibition in Scarborough to be handed in for Monday!
I would like to thank Anna from http://nature-trail.blogspot.com/ for allowing me to use some of her photographs of bougainvillea as reference images for the scenic painting.
Looks ace Aitch! All your hard work is worth it. Love that you have slipped some of your canvas paintings into the production as well. Excellent! x
ReplyDeleteThanks Andrea - yes, well, use whatever space is available eh?
ReplyDelete